Week 13: Moulding and Casting
This week explores moulding and casting, processes widely used in mass production. Sand moulding and casting are used to make engines, while plastic injection moulding produces many plastic parts found in the market. The assignment focuses on creating a counter mould using digital design tools and CNC machining, followed by casting with silicone.

Introduction
Moulding
Moulding is the process of creating a mould, a hollow or negative cavity of the desired product. Materials like plastics, metals, or resins are poured or injected into this cavity, curing over time to form the final product. Moulds can be made from plastic, silicone, sand, or metals, with metal moulds commonly used in injection moulding. Some moulds are crafted directly via CNC, while others are formed by pressing a positive part into the mould material to create the negative shape. Common products like bricks are also made using moulds.
Types of Moulding:
- Injection moulding
- Compression moulding
- Extrusion moulding
- Blow moulding
- Reaction injection moulding
- Matrix moulding
- Rotational moulding
- Transfer moulding
- Thermoforming mould
- Glass reinforced plastic moulding
Casting
Casting involves pouring a liquid material into a mould with a hollow cavity of the desired shape, allowing it to solidify. The solidified part, called a casting, is then removed from the mould. Common casting materials include metals, epoxy, concrete, plaster, and clay. Casting is ideal for creating complex shapes that are difficult or costly to produce using other methods.
Individual Assignment
Individual Assignment: Develop a counter mould using a digital model, CNC machining, and silicone casting to create a final moulded product.
1. Selection of the Digital Model
Sandra selected a three-dimensional model in STL format from the Thingiverse platform, which served as the base geometry for the counter mould. Using Thingiverse provided access to open, ready-to-machine models, speeding up the prototyping process.

2. Import and Preparation in SolidWorks
The STL file was imported into SolidWorks, where a thickness was added to the model to create the counter mould. The STL was converted into a single solid block to ensure geometric integrity for machining.
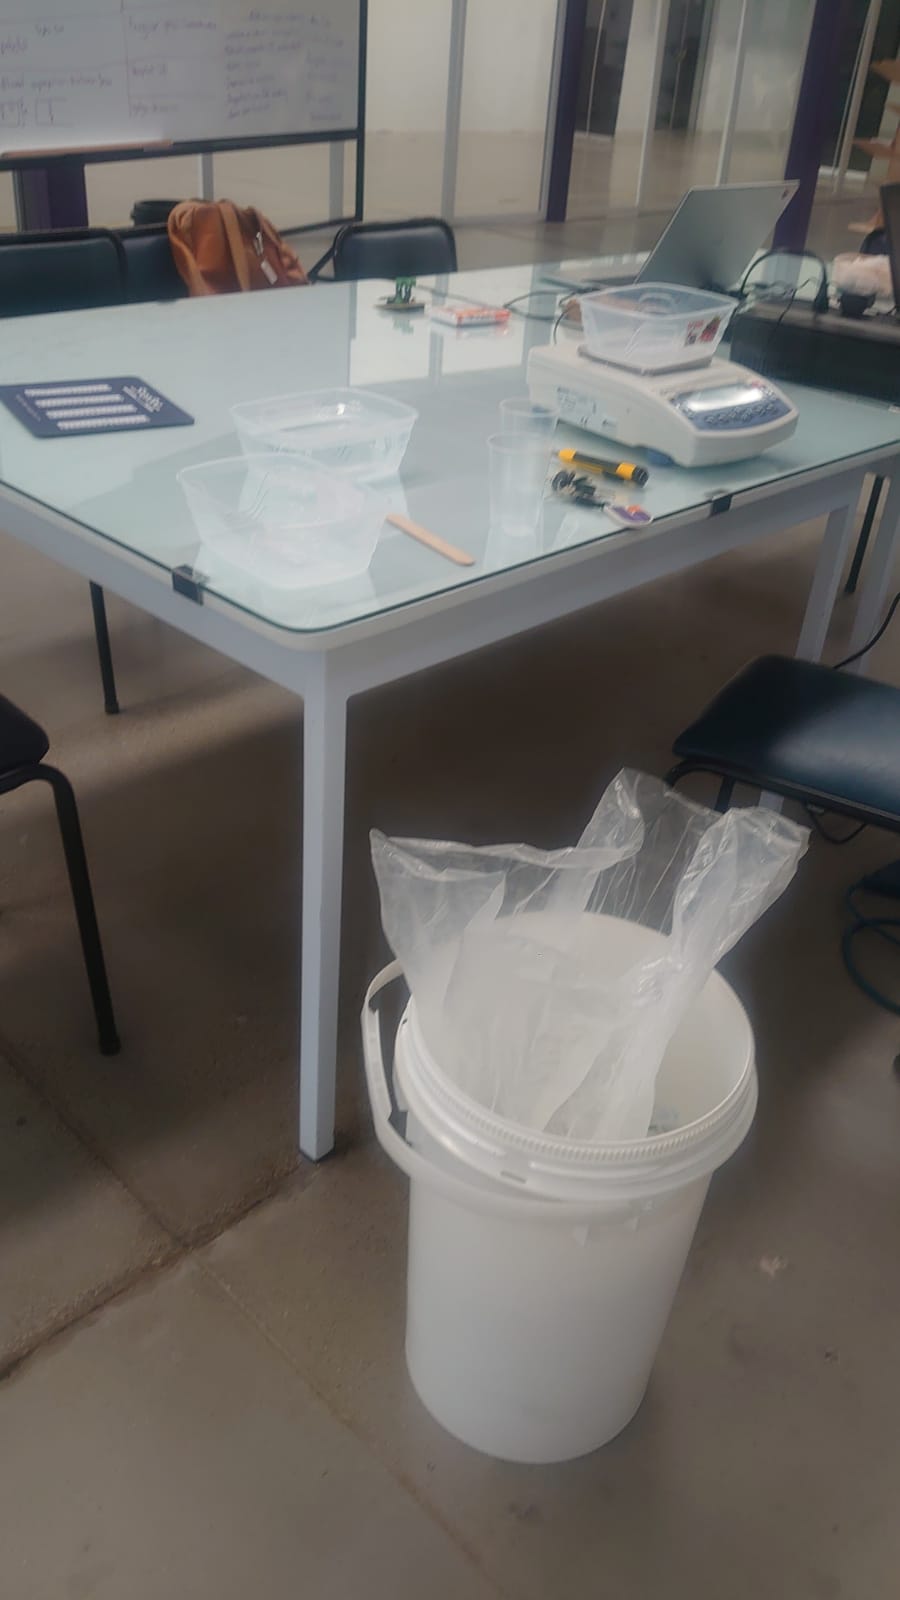
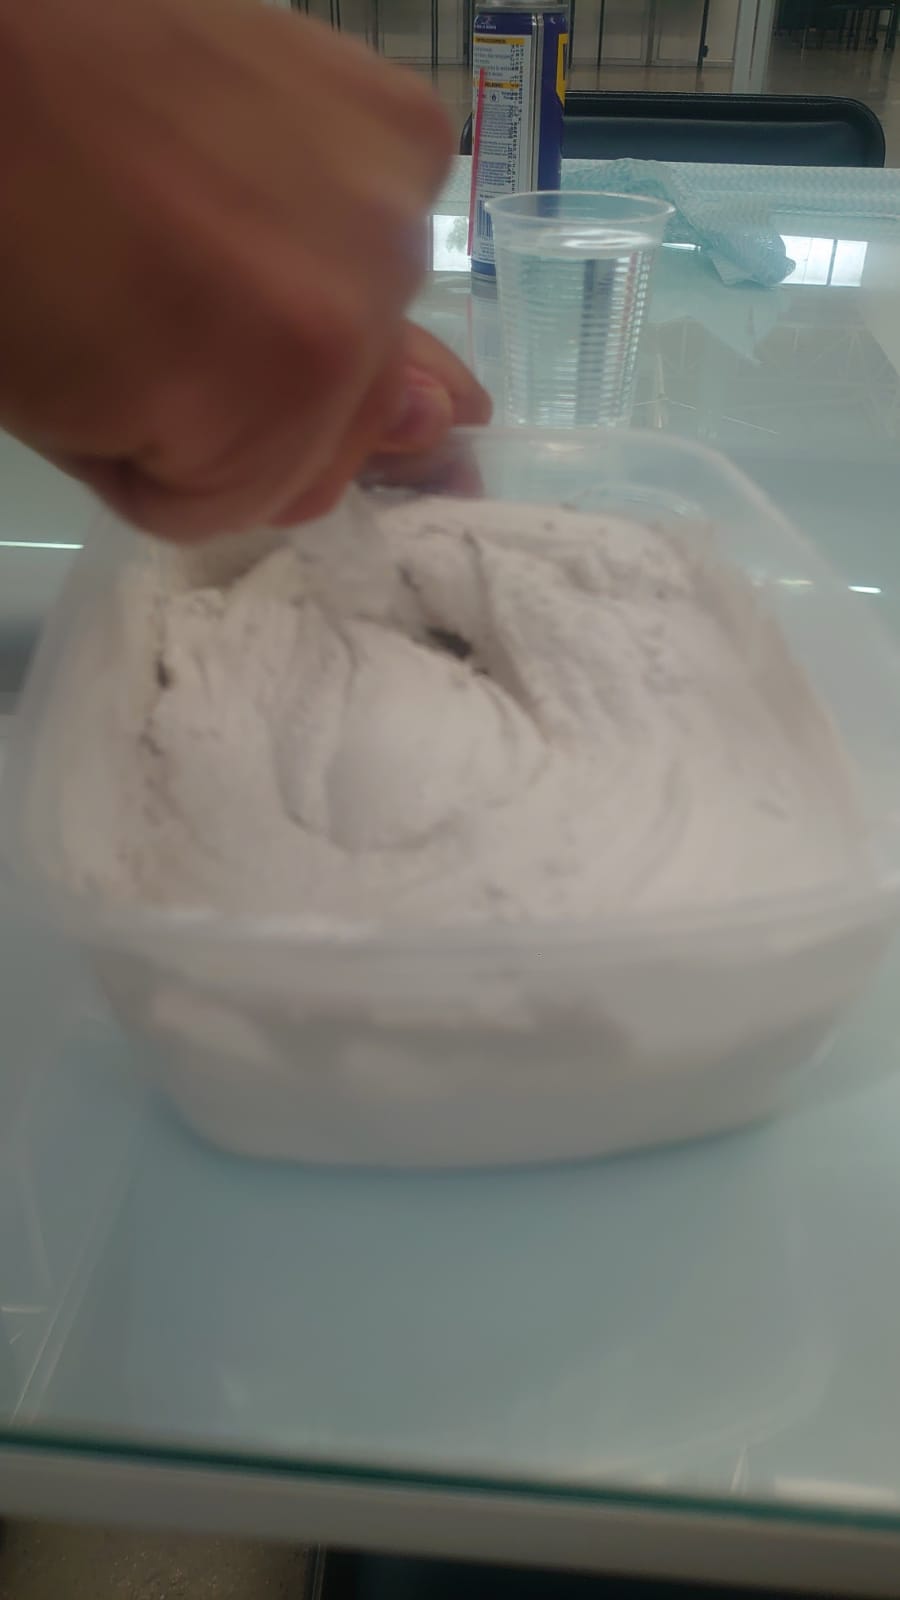
3. Preparation of Plaster Moulds
A plaster mixture was prepared with an 80/20 ratio (80% gypsum, 20% water), mixed until homogenized, and poured into plastic moulds. The drying time was approximately 4 days due to time constraints, though 8 days is recommended.
4. Post-processing and Preparation for Machining
The solid model was exported as an STL file for CNC machining on a ShopBot. Post-processing included verifying scales, dimensions, and generating cutter paths with appropriate depth and speed settings.
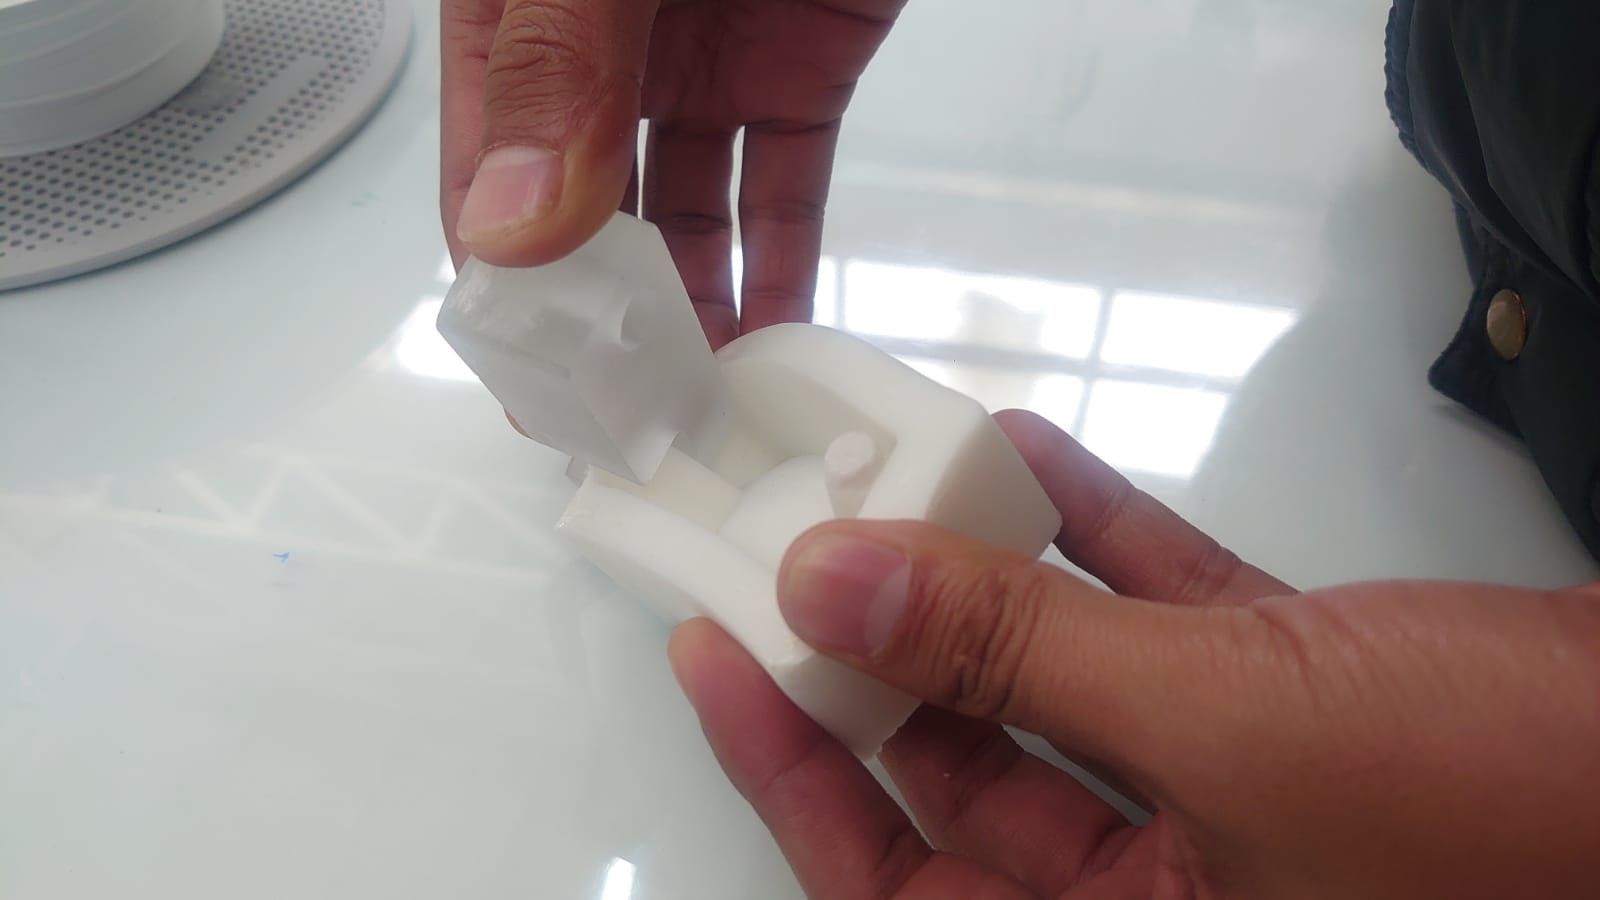
5. Making the Mould in Silicone
After machining, a silicone rubber mould was created. According to the technical data sheet, the solidification time is 7 hours, with a full drying process of 12 hours.
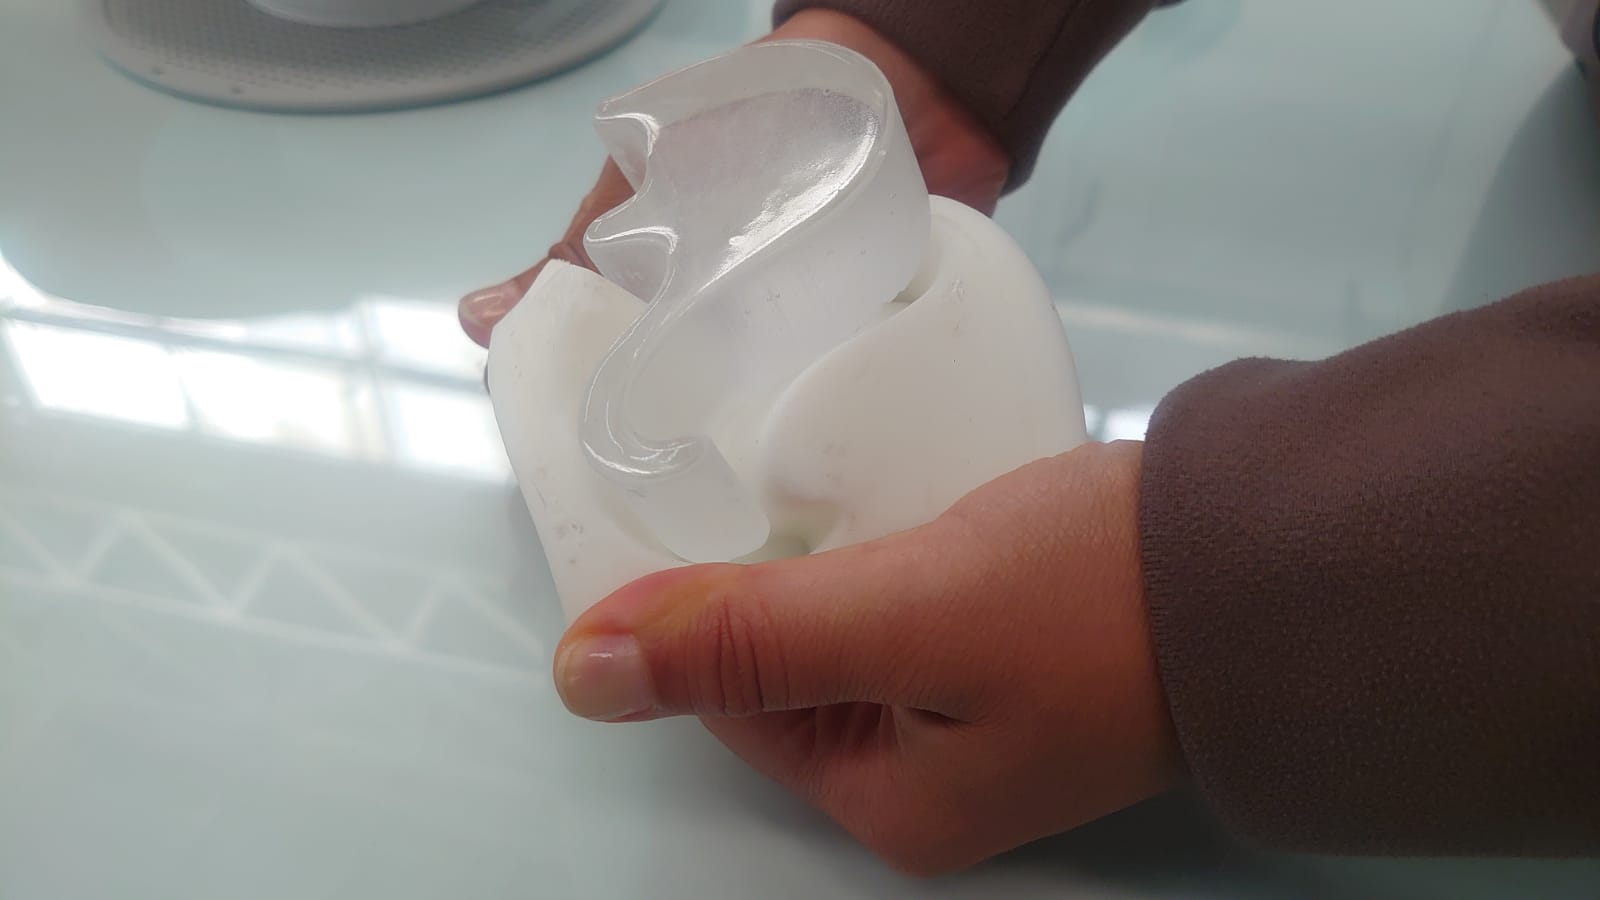
6. Unmoulding
The final moulded product was removed from the silicone mould, completing the casting process.

Final Results Gallery

Final Reflections
The individual work demonstrates a correct application of 3D design tools, digital fabrication, and material handling for moulds. The process integrated downloading and adapting digital models, computer-aided design, CNC fabrication, and the application of material data sheets in a practical environment. This workflow reflects the fundamental principles of digital design and manufacturing, combining parametric modelling, subtractive manufacturing, and prototyping with advanced materials.
- Downloading and adapting digital models
- Computer-aided design
- CNC fabrication
- Application of material data sheets
Group Assignment
Group Members
- Sandra Hipatia Núñez Torres
- Manuel Ignacio Ayala Chauvin
Objective: Apply moulding and casting techniques using plaster, silicone rubber, and epoxy resin. Explore mould manufacturing methods and compare CNC machining vs. 3D printing.
We started by reviewing the technical and safety data sheets for plaster, silicone rubber, and epoxy resin, analyzing their mixing, curing, and handling properties. Comparison casts were made to study their behavior and results.
Material Analysis
We examined three essential materials used in moulding and casting:
- Plaster (Yeso)
- Silicone Rubber
- Epoxy Resin
Each material's technical data sheet was studied, focusing on physical properties, mixing and curing times, and safety guidelines.
Plaster
Composition: Calcium sulfate hemihydrate (CaSO₄·½H₂O).
Mix ratio: 80% plaster and 20% water, mixed until smooth and lump-free.
Drying time: Ideally 8 days, though used after 4 days due to time constraints.
Silicone Rubber
Properties: Flexible, tear-resistant, excellent for capturing detail.
Curing time: 7 hours for solidification, 12 hours for complete drying.
Epoxy Resin
Use: Applied inside silicone moulds for final casting.
Working time: 20 hours to solidify, 72 hours for full cure.
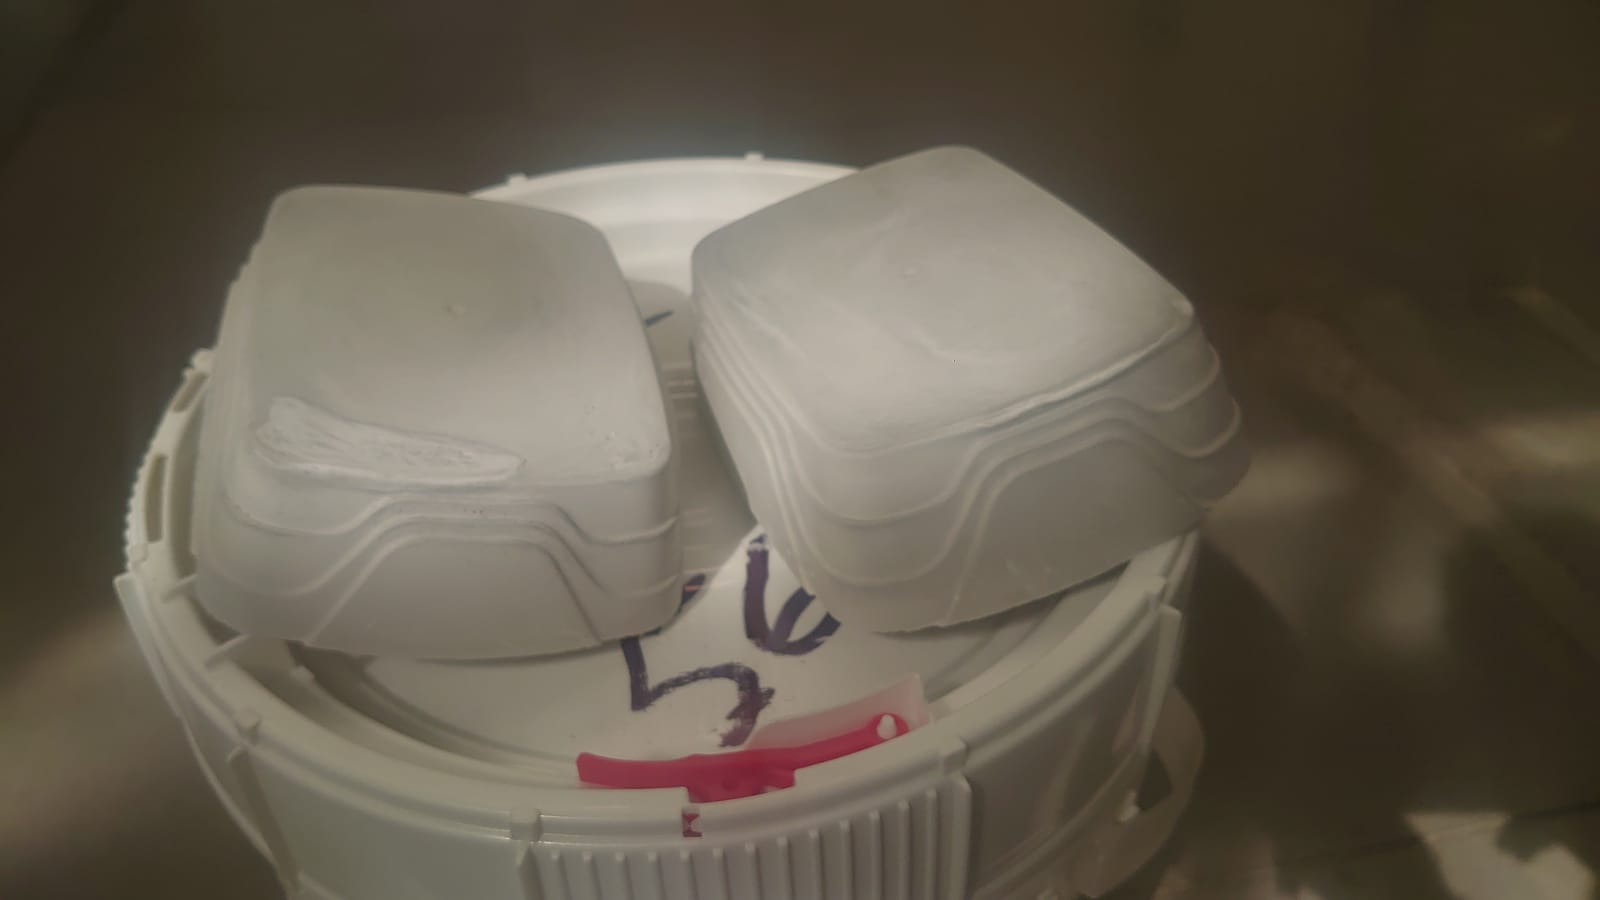
1. Preparation of Plaster Blocks
Plaster blocks were prepared with an 80/20 plaster-to-water ratio, stirred until homogeneous, and poured into plastic moulds. Drying took 4 days instead of the recommended 8 days, requiring careful handling.

Figure 1. Pouring the plaster mix into moulds manually. The fluid consistency is ideal for even filling.

Figure 2. Solidified plaster blocks, ready for machining. Smooth texture and no air bubbles.
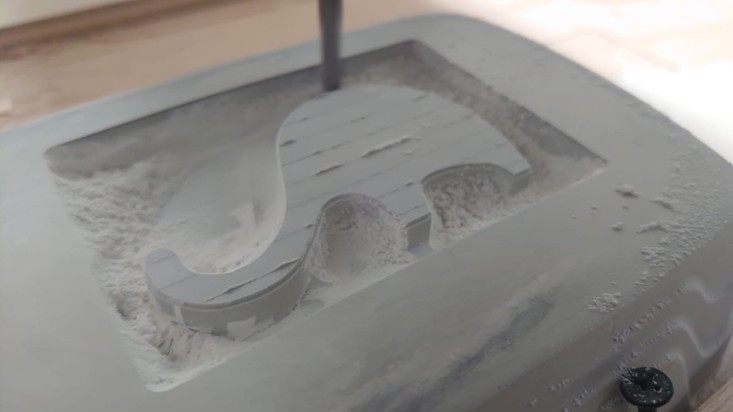
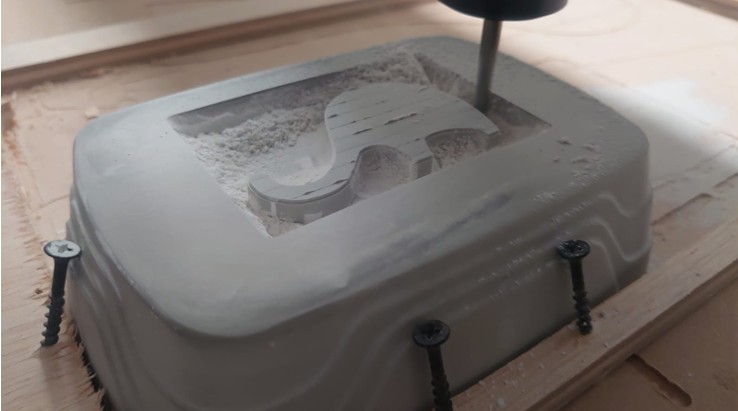
2. Machining of Custom Designs
Each team member selected a personal design:
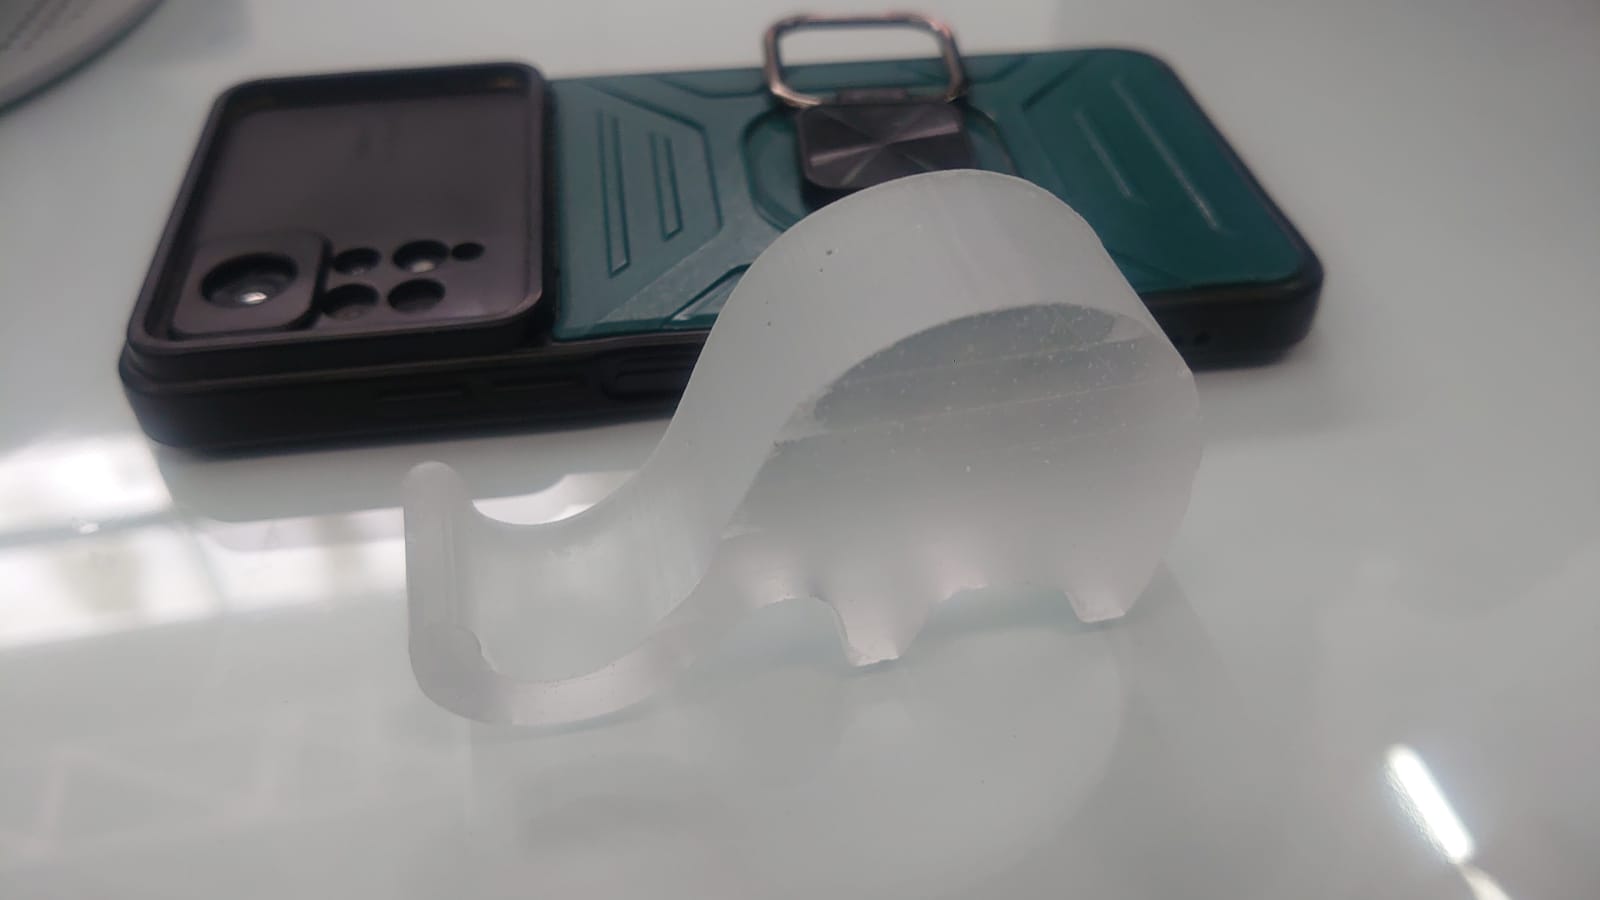
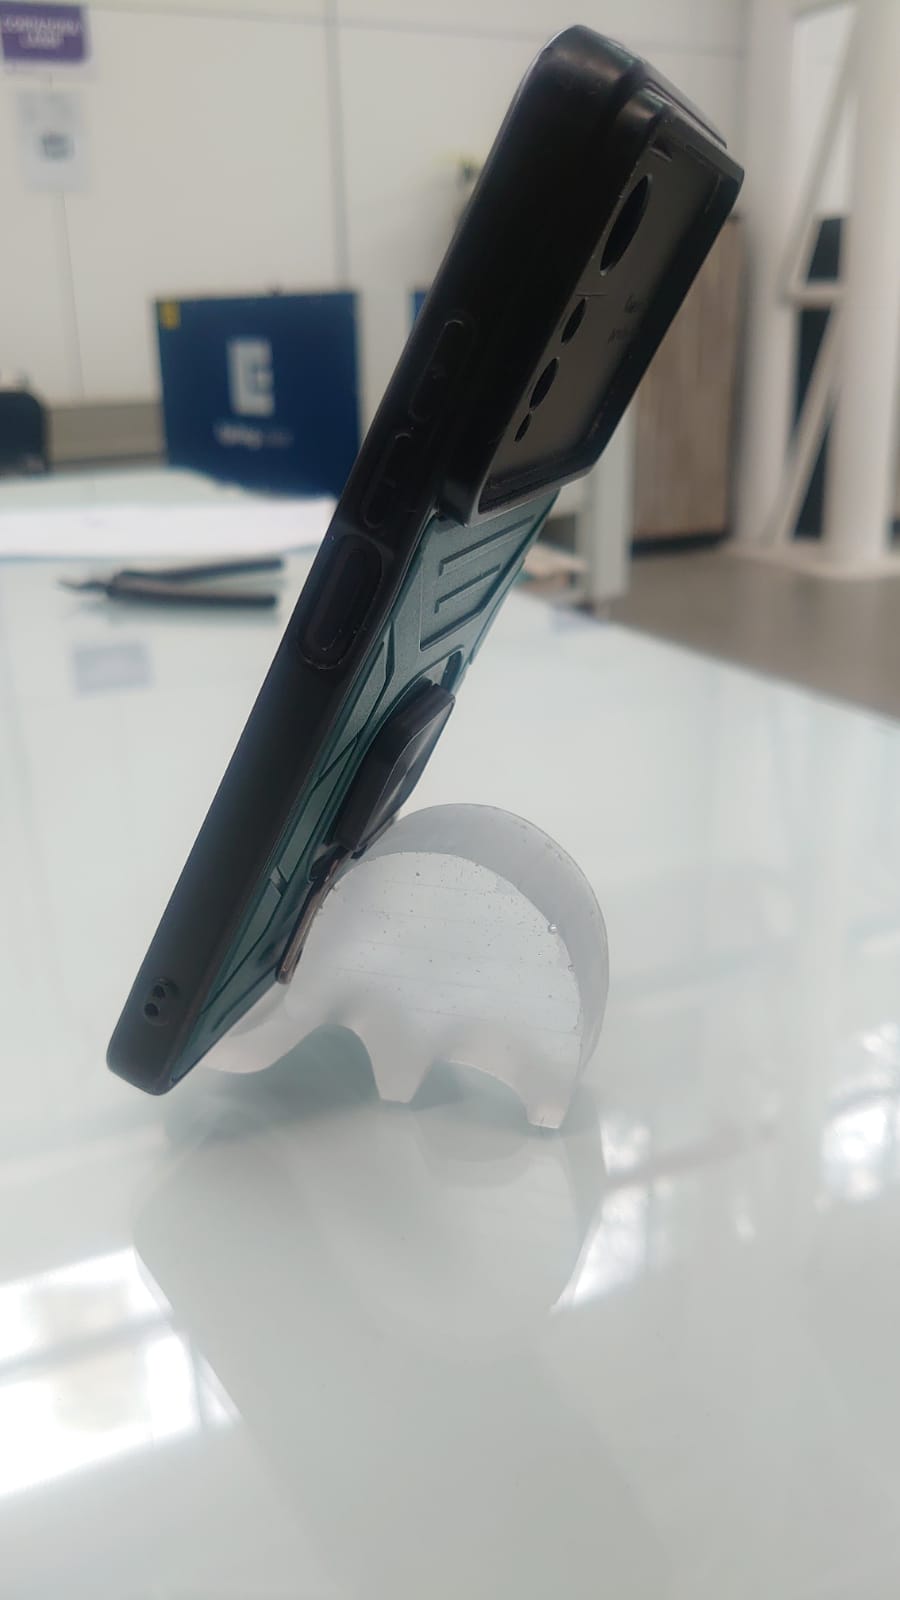
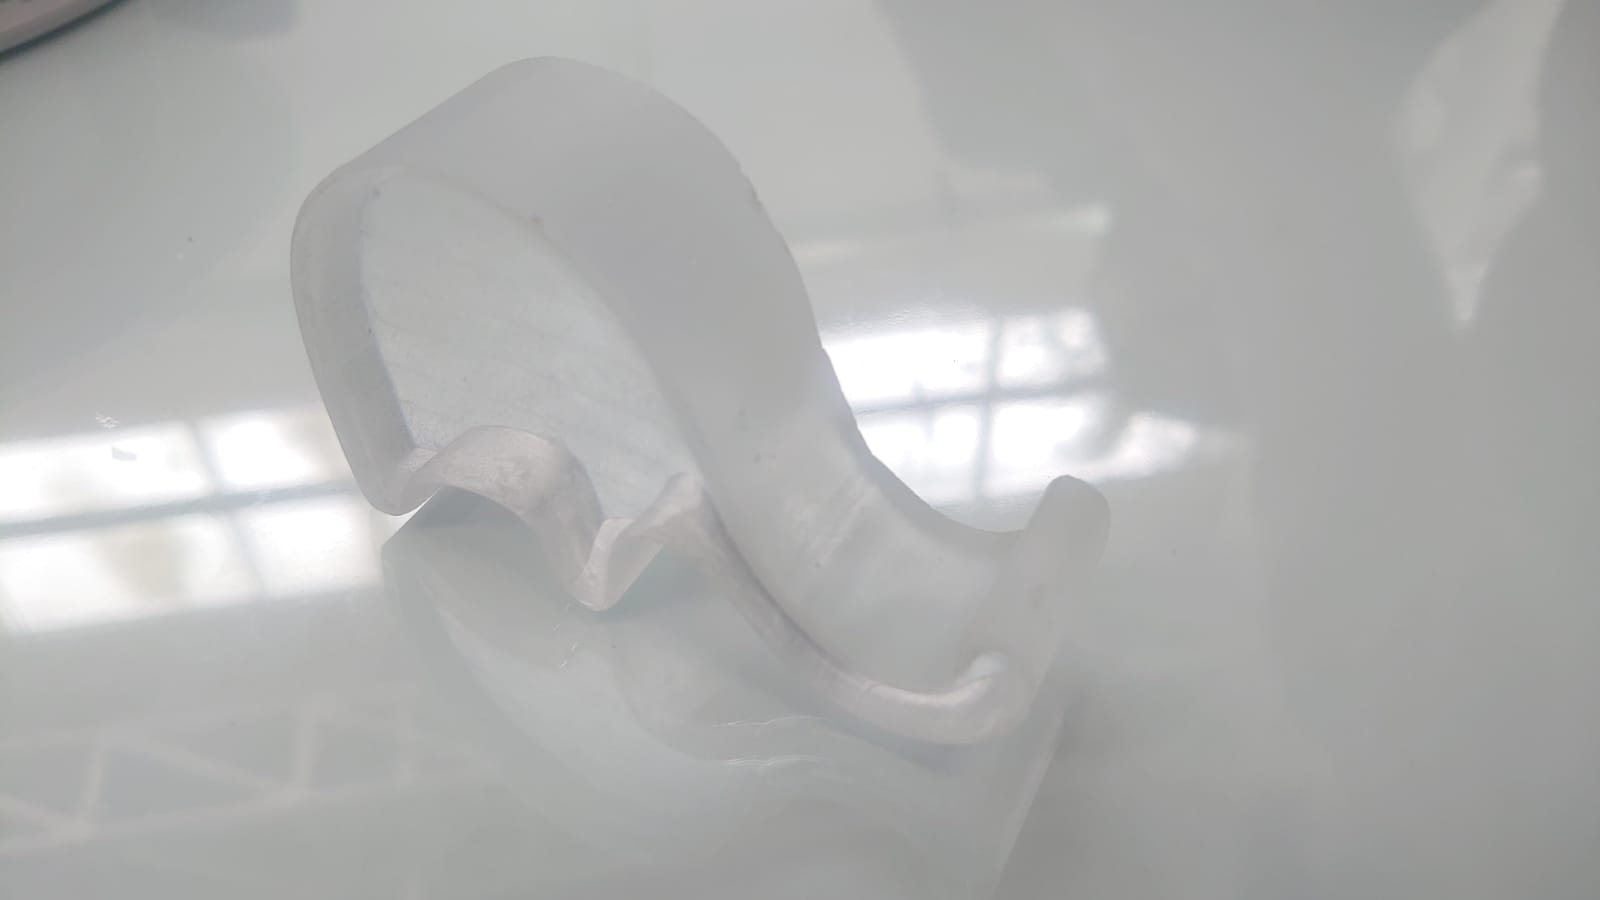
- Sandra: An elephant – symbol of memory and strength.
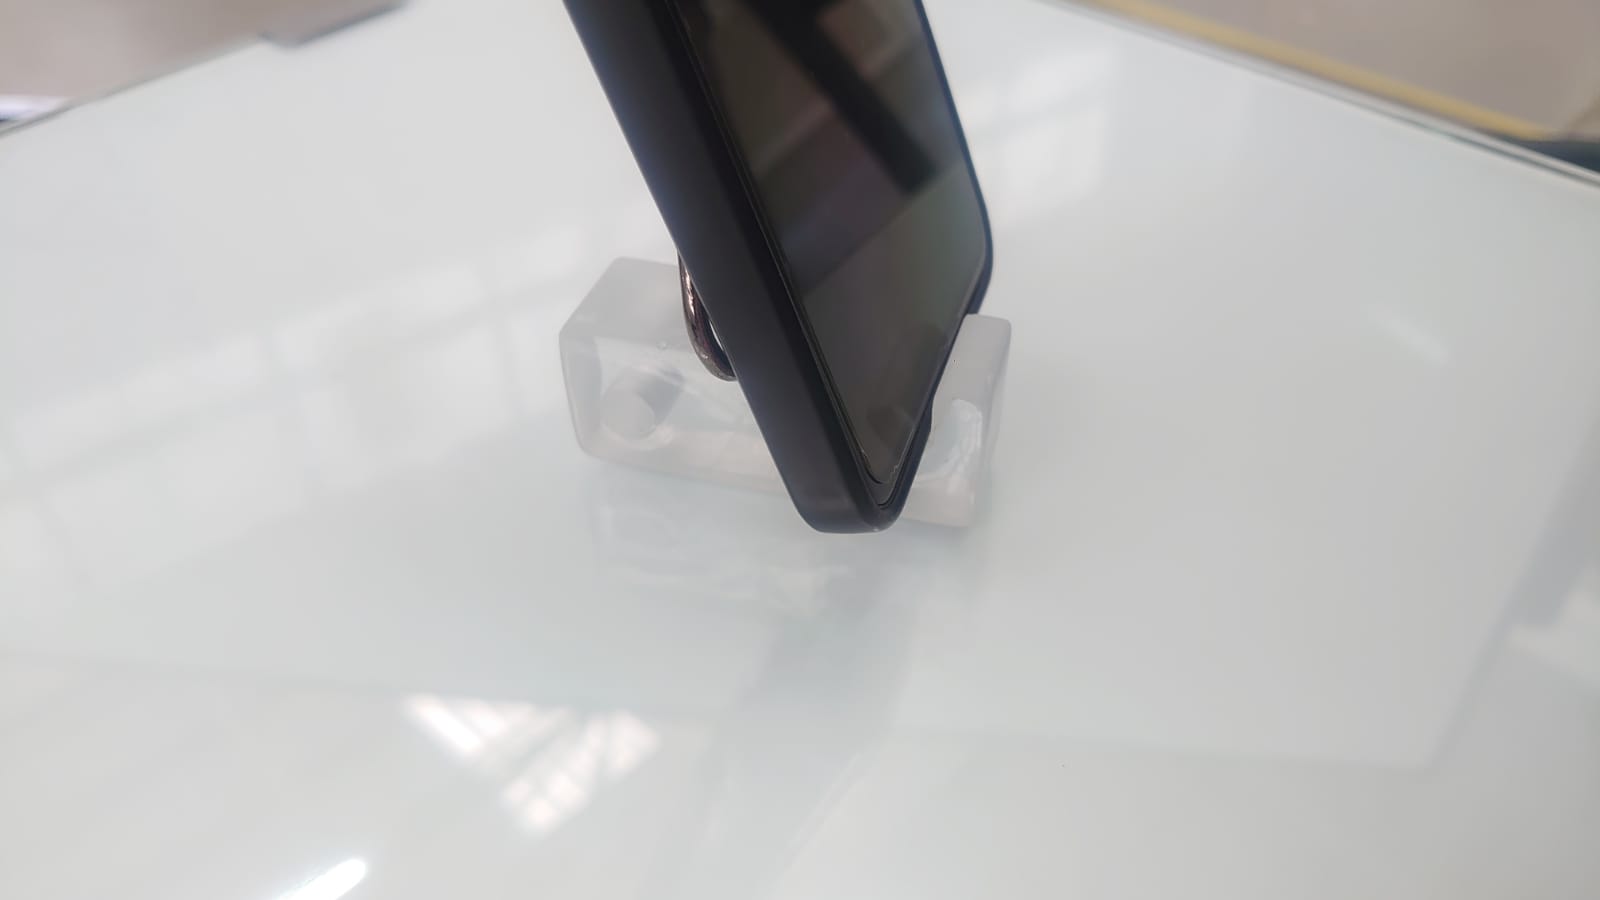
- Manuel: A structural support – functional and precise.
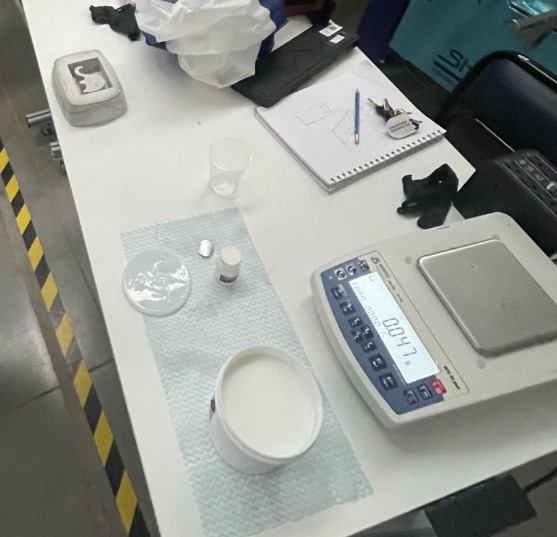
Figure 3. CNC milling of the elephant shape into plaster. Clean contours and detailed carving.
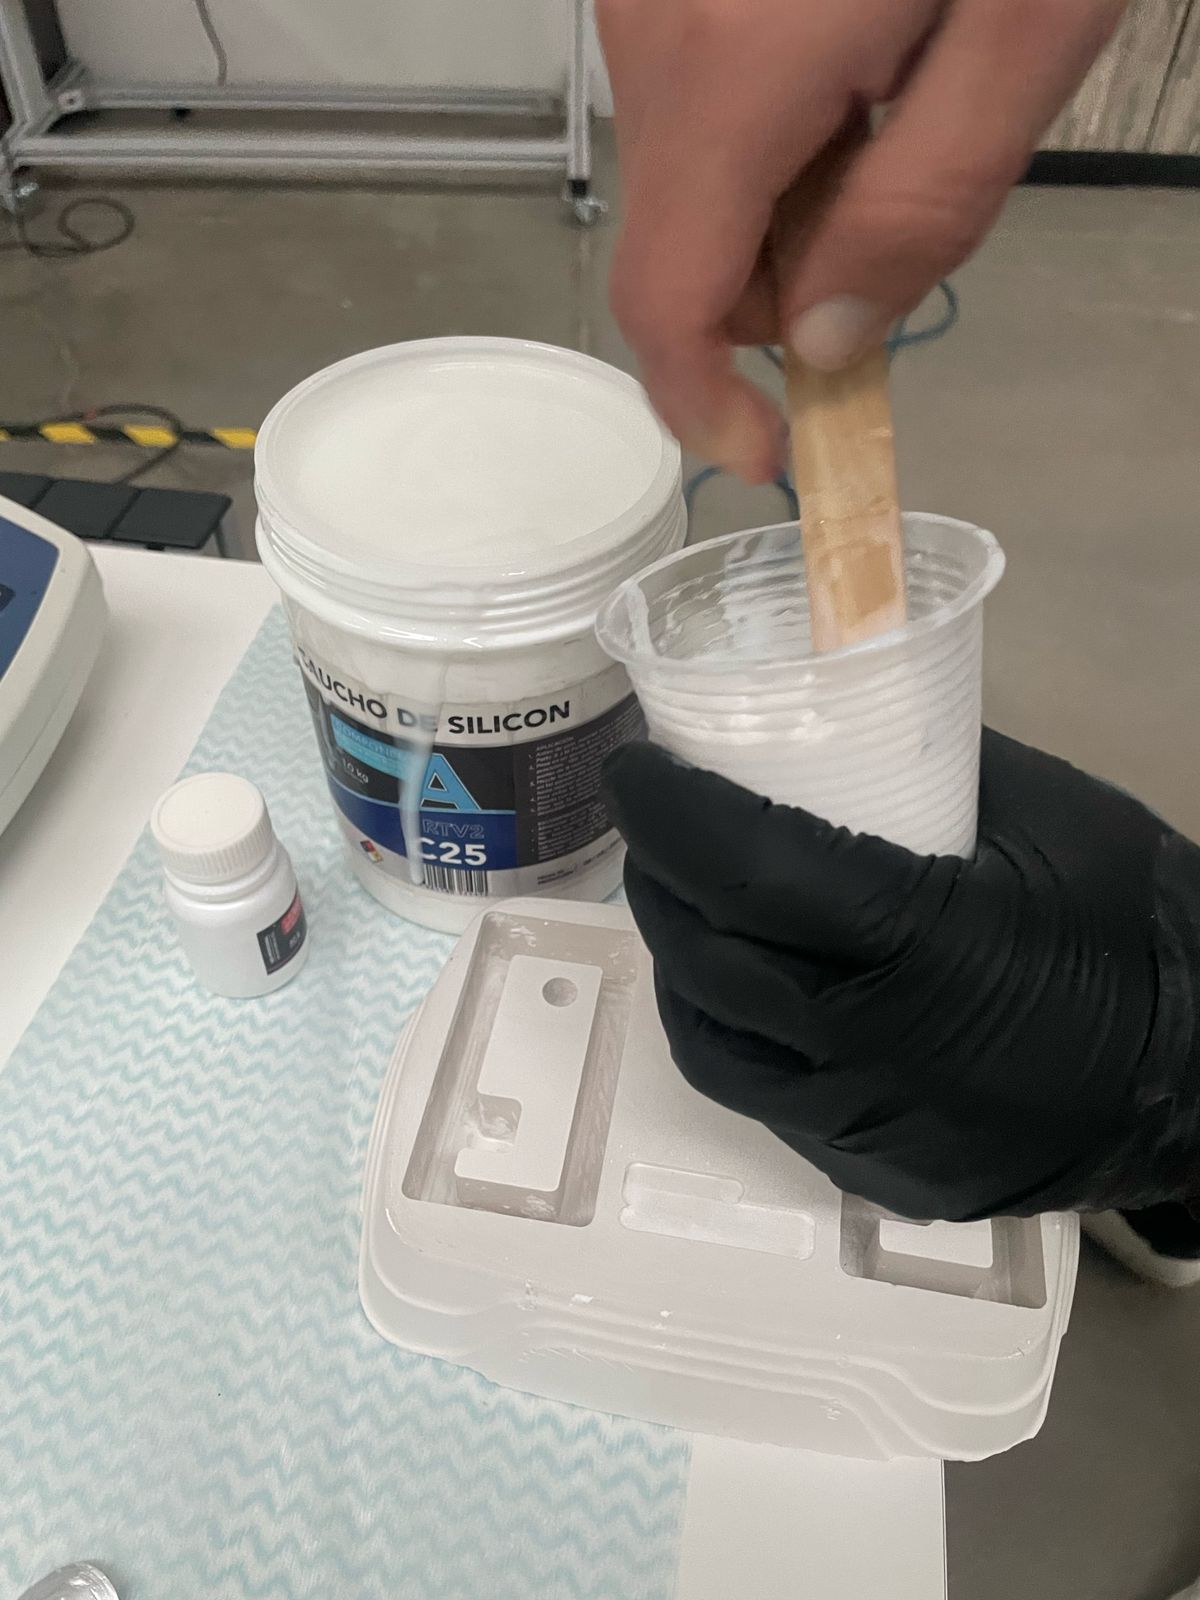
Figure 4. Machining of the support model. Sharp edges and recessed zones stand out.
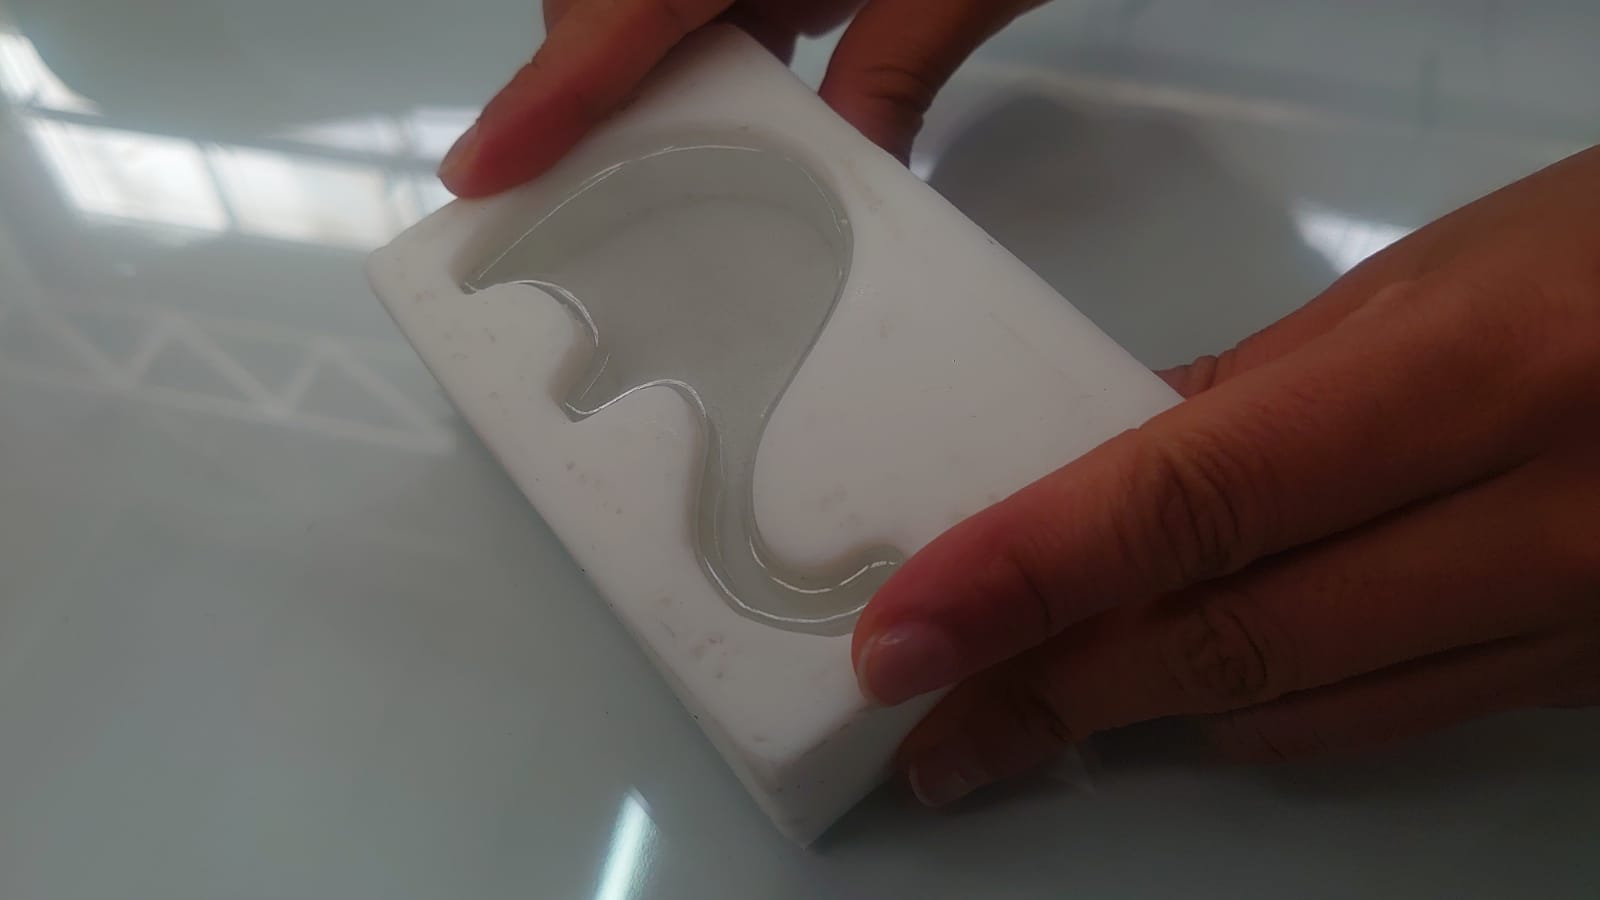
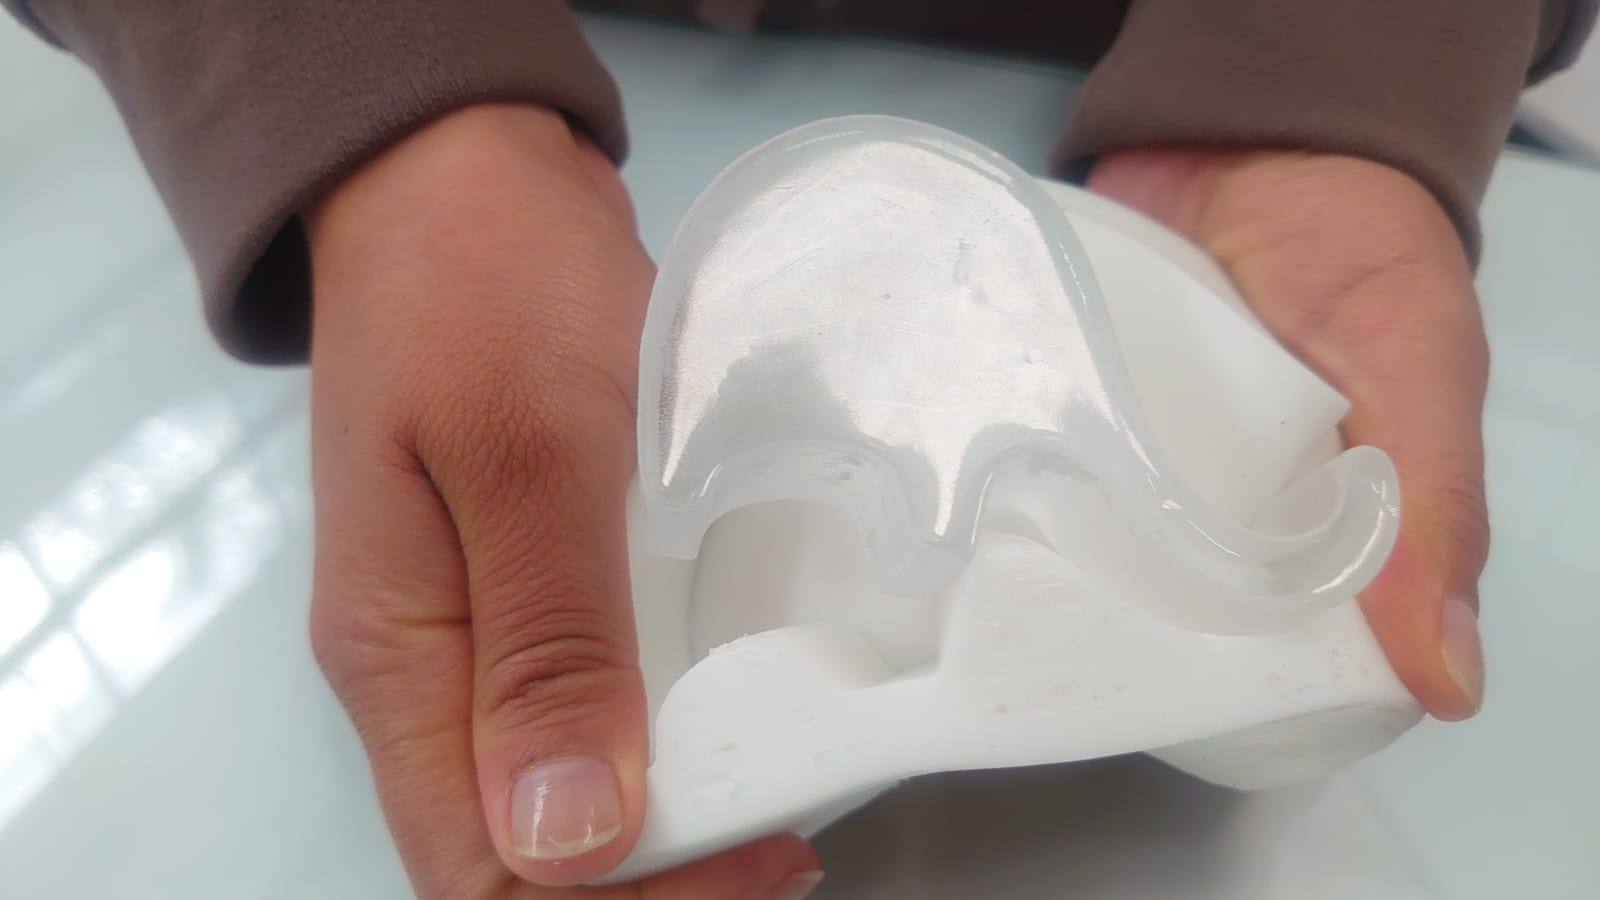
3. Silicone Mould Creation
Silicone rubber was poured over the machined models to create flexible moulds, with a solidification time of 7 hours and demoulding readiness after 12 hours.
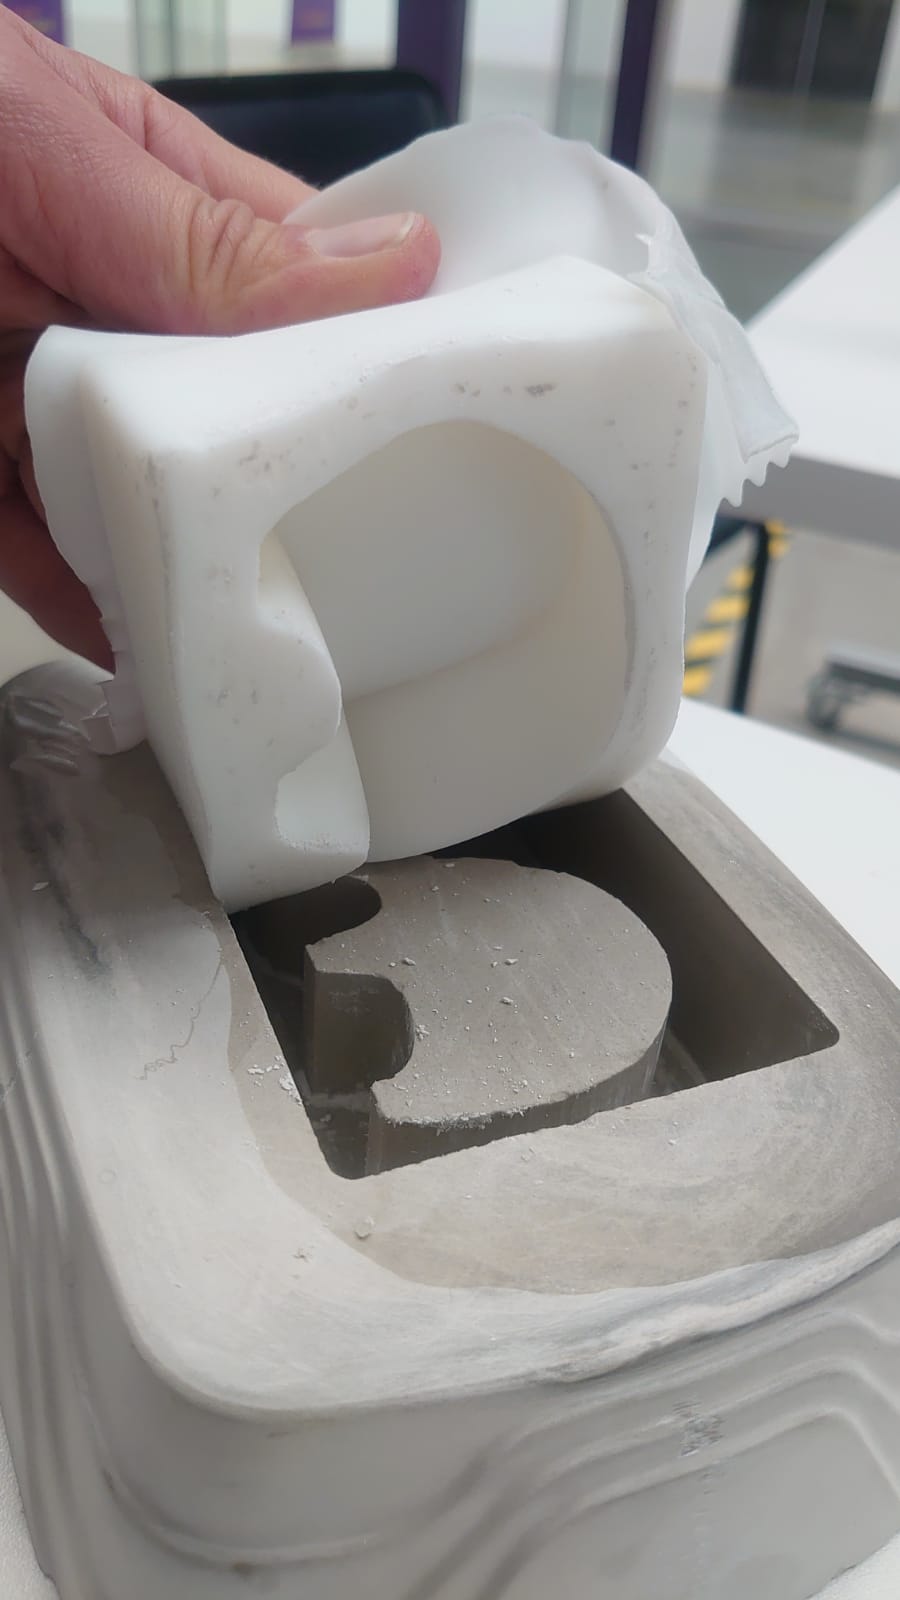
Figure 5. Silicone rubber is carefully poured over the model to capture fine detail.
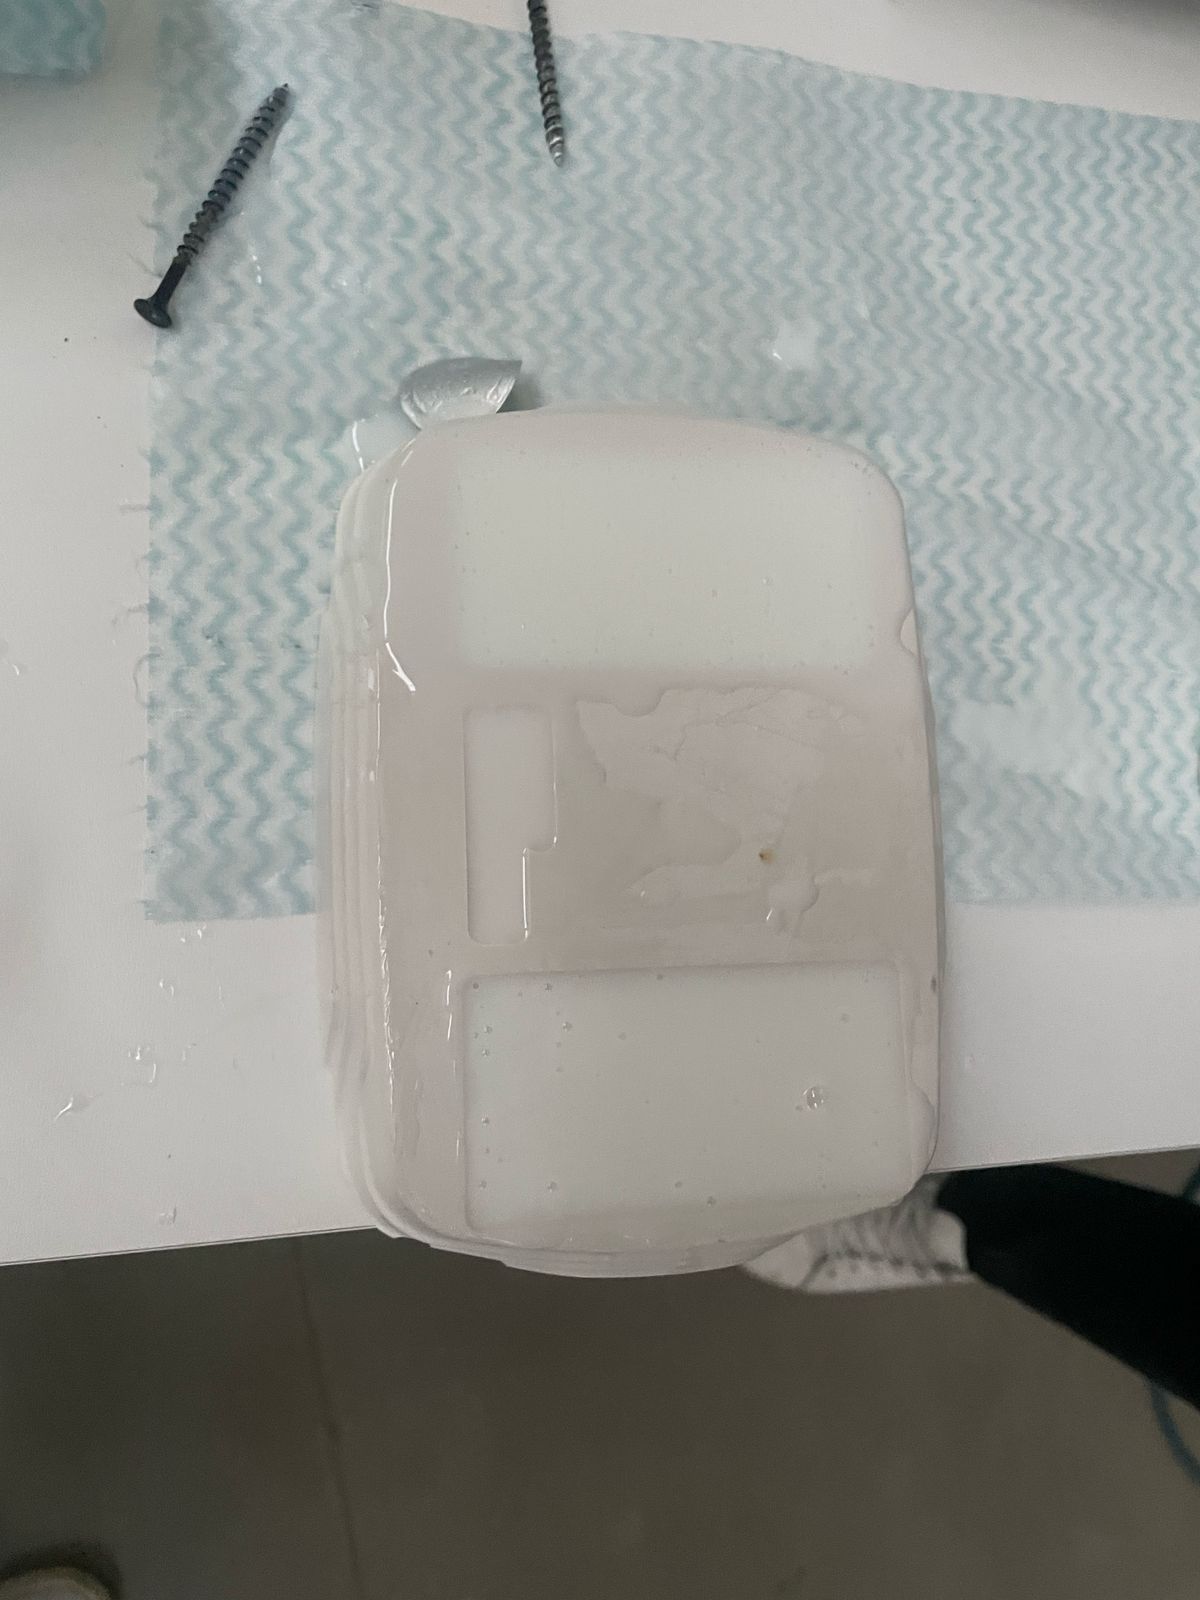
Figure 6. Final silicone moulds for the elephant and support – reusable and durable.
4. Resin Casting
Epoxy resin was cast into the silicone moulds, requiring 20 hours to solidify and 72 hours for a full cure.
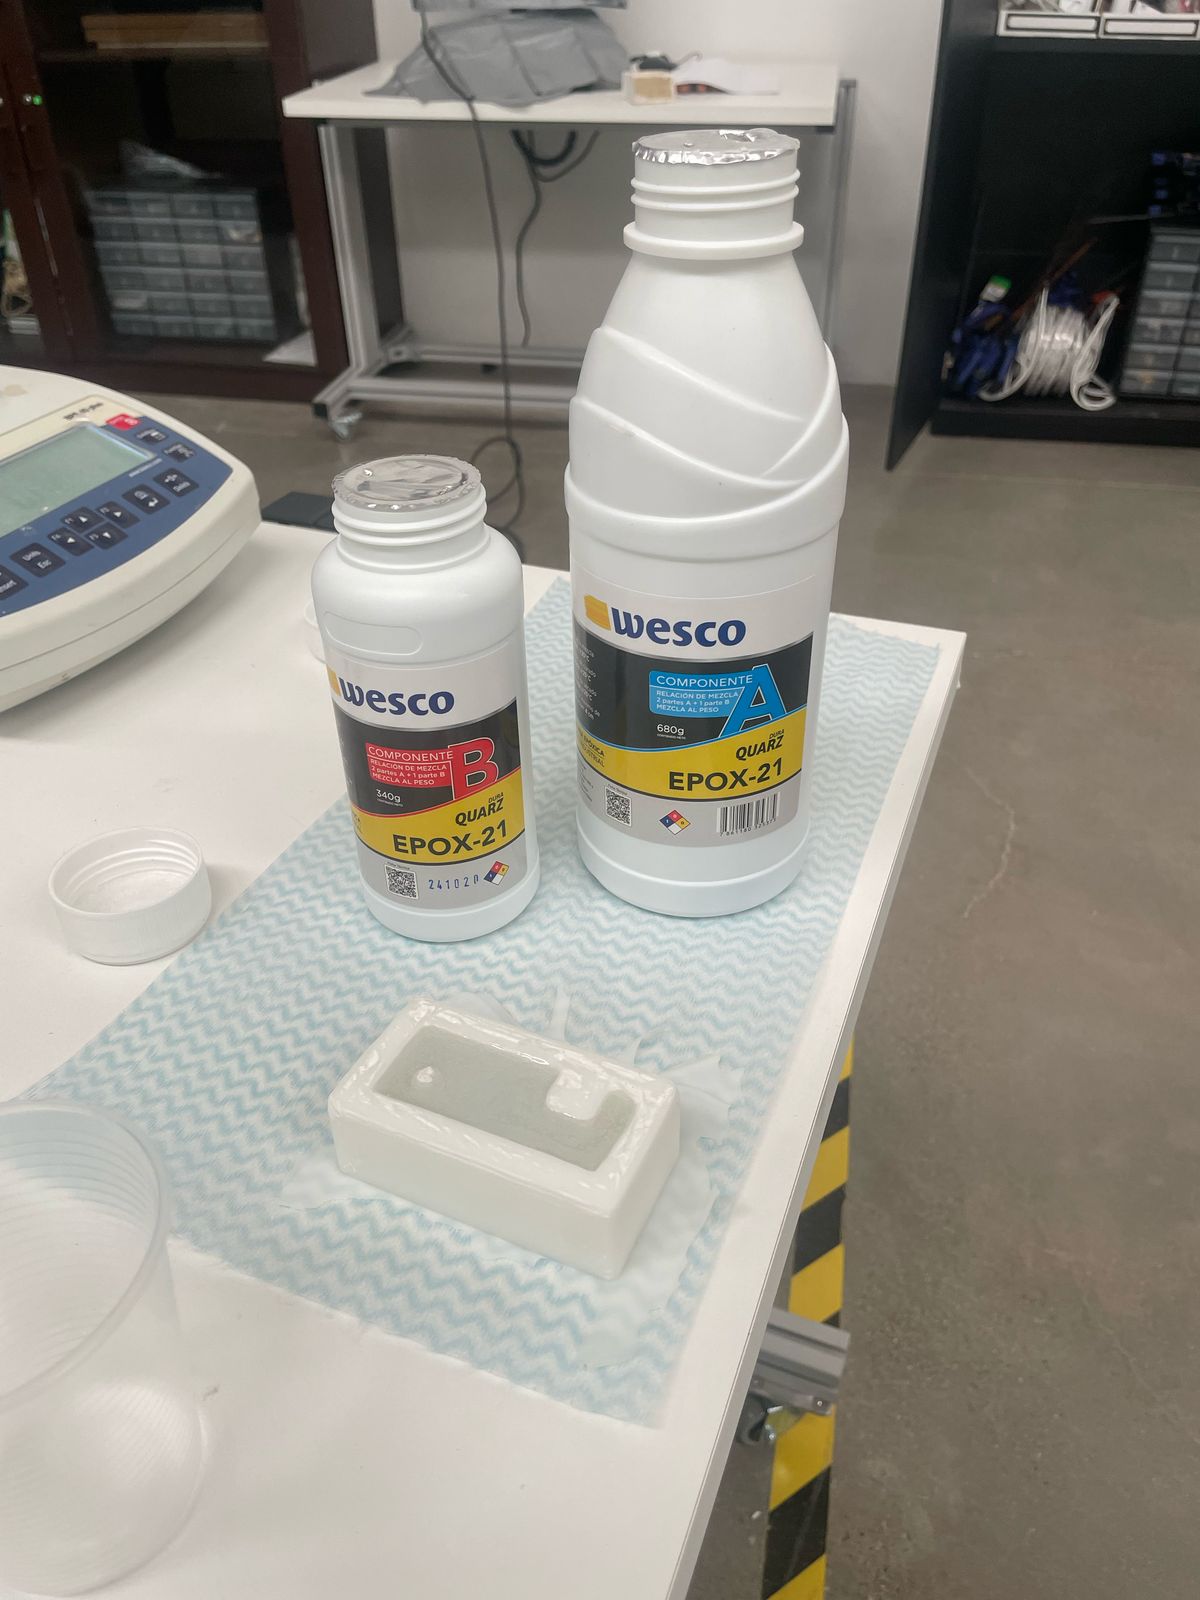
Figure 7. Epoxy resin being poured into the prepared silicone mould with precision.
5. Results
The final products were:
- A resin elephant (Sandra)
- A functional support in resin (Manuel)
6. Comparison: 3D Printing vs. CNC Machining
| Aspect | 3D Printing | CNC Machining (used) |
|---|---|---|
| Detail Precision | Very High | High (tool-limited) |
| Production Time | Slow (depending on model) | Moderate |
| Material Cost | High (filaments) | Low (plaster) |
| Mould Reusability | Limited | High with silicone moulds |
| Versatility | High (complex forms) | Medium (simple geometries) |
Conclusion
Reviewing the data sheets ensured a safe and efficient moulding and casting process, producing functional and well-formed pieces. The project provided insights into the complete workflow, from material preparation to final fabrication.
Collaborative work enabled the production of two detailed resin pieces—a figurative elephant and a structural support—while reinforcing skills in managing timelines, following technical data sheets, and adapting to constraints.
The comparison between CNC machining and 3D printing enriched our understanding of digital fabrication strategies, highlighting their pros and cons based on design and production needs.